

How to Optimize Switchgear Layout for Maximum Operational Efficiency?
2026-09-24
Two substations. Same Switchgear models. Same electrical capacity. Same budget. Yet one takes 45 minutes for a routine breaker replacement, while the other takes 2 hours and requires a crane. The difference is not the equipment. It is the layout. Switchgear layout determines how quickly a technician can access a compartment, how easily a cable can be pulled, and how effectively heat can escape the room. It also determines whether future expansion is a simple addition or a complete rebuild. This guide is written for electrical design engineers who need to make layout decisions that will affect operations for the next 30 years.
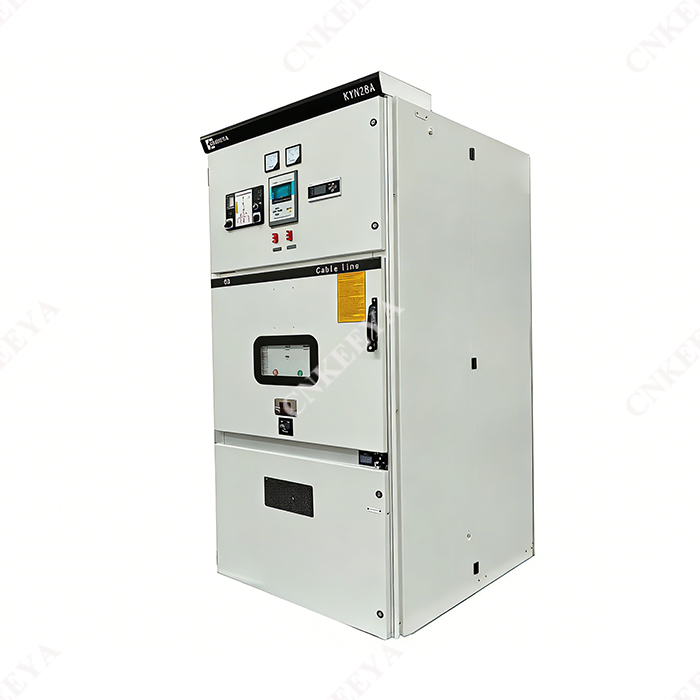
1. What Aisle Width Is Required for Safe and Efficient Maintenance?
The aisle width is the single most important layout dimension. It determines whether a technician can open a breaker compartment door fully, whether a pallet jack can move a replacement breaker into position, and whether two people can pass each other during an emergency. The minimum aisle width for a low-voltage Switchgear room is 1.0 meter, according to the National Electrical Code. But the minimum is not the optimum. For efficient maintenance, the aisle should be wide enough for the compartment door to open 90 degrees plus 0.6 meters of clearance. For a typical 600 mm deep breaker, this means an aisle width of 1.5 to 1.8 meters. The table below shows the recommended aisle widths for different switchgear configurations.
| Switchgear type | Breaker depth | Minimum aisle width | Recommended for efficiency |
| Low-voltage (LV) draw-out | 600 mm | 1.0 m | 1.5 – 1.8 m |
| Medium-voltage (MV) draw-out | 800 – 1000 mm | 1.2 m | 2.0 – 2.5 m |
| Fixed-mounted LV | 400 mm | 0.9 m | 1.2 – 1.5 m |
| Arc-resistant MV | 1000 mm | 1.5 m | 2.5 – 3.0 m |
In our factory, we manufacture Switchgear compartments with a standard depth of 600 mm for LV and 1000 mm for MV. Our design guide recommends a front aisle of 1.8 meters for LV and 2.5 meters for MV. This provides enough space for a technician to work comfortably and for a pallet jack to position a replacement breaker. We also recommend a rear aisle of 0.9 meters for cable termination and inspection.
2. How Should Cable Routing Be Planned to Reduce Installation Time?
Cable routing is the second most important layout factor. Poor routing increases installation time, creates tripping hazards, and makes future modifications difficult. The routing should be planned so that power cables and control cables are separated. Power cables should be routed in the bottom of the switchgear or in a dedicated cable trench. Control cables should be routed in a separate tray at the top. This separation prevents electromagnetic interference. The routing should also allow for the bending radius of the cables. A 300 mm² power cable requires a bending radius of 12 times the diameter, which is approximately 300 mm. If the cable tray is too narrow, the cable cannot be bent properly, and the insulation may be damaged. The table below shows the recommended tray width for different cable sizes.
| Cable size | Number of cables per tray | Minimum tray width | Recommended tray width |
| 35 mm² | 10 | 200 mm | 300 mm |
| 95 mm² | 6 | 300 mm | 400 mm |
| 185 mm² | 4 | 400 mm | 500 mm |
| 300 mm² | 3 | 500 mm | 600 mm |
| 2 x 300 mm² | 2 | 600 mm | 800 mm |
Zhejiang Hanya Electric Appliance Co., Ltd. manufactures Switchgear with integrated cable trays and termination compartments. Our factory can provide a cable routing layout drawing for each project. We also offer a cable bending radius calculator to help designers select the right tray width.
3. How Does Ventilation and Heat Dissipation Affect Switchgear Layout?
Switchgear generates heat from the conductors, the breakers, and the busbars. If the heat is not dissipated, the temperature inside the room rises, which reduces the current carrying capacity of the equipment and shortens the life of the insulation. The layout must provide a path for cool air to enter at the bottom and hot air to exit at the top. The ventilation openings should be sized to handle the total heat load. A typical LV Switchgear room with 2000 A of connected load generates 10 to 15 kW of heat. This requires a ventilation rate of 2,000 to 3,000 m³/h. The table below shows the recommended ventilation rate for different switchgear ratings.
| Switchgear rating | Typical heat load | Recommended ventilation rate | Minimum opening area |
| 1000 A | 5 – 7 kW | 1,000 – 1,500 m³/h | 0.15 m² |
| 2000 A | 10 – 15 kW | 2,000 – 3,000 m³/h | 0.30 m² |
| 3200 A | 18 – 25 kW | 3,500 – 5,000 m³/h | 0.50 m² |
| 4000 A | 25 – 35 kW | 5,000 – 7,000 m³/h | 0.70 m² |
In our factory, we design Switchgear rooms with a minimum ceiling height of 3.5 meters to allow for a hot air layer above the equipment. We also recommend a temperature-controlled ventilation system that activates when the room temperature exceeds 35°C. For rooms with a high dust load, we recommend filtered ventilation to prevent dust from entering the switchgear.
4. How Should Future Expansion Be Planned Into the Initial Layout?
Future expansion is the most overlooked factor in Switchgear layout. A room that is laid out without spare space will require a complete shutdown and rearrangement when a new line is added. The recommended approach is to reserve 20 to 30 percent of the wall space for future Switchgear sections. The busbars should be extended to the reserved space, and the cable trench should be sized to accommodate the additional cables. The table below shows the recommended spare space for different initial configurations.
| Initial configuration | Initial width | Recommended spare space | Total room width |
| 5 sections LV | 3.0 m | 1.0 m (2 sections) | 4.0 m |
| 8 sections LV | 4.8 m | 1.5 m (3 sections) | 6.3 m |
| 5 sections MV | 4.0 m | 1.6 m (2 sections) | 5.6 m |
| 10 sections MV | 8.0 m | 2.4 m (3 sections) | 10.4 m |
Design tip: When planning the room width, add the spare space to the initial width and then add the aisles. A common mistake is to calculate the aisle width based on the initial configuration and then find that the aisle is too narrow when the spare sections are installed.
Zhejiang Hanya Electric Appliance Co., Ltd. manufactures Switchgear with extendable busbars and modular sections that can be added without replacing the existing equipment. Our factory provides a layout drawing that shows the initial configuration and the expansion plan.
Frequently Asked Questions About Switchgear Layout Optimization
Summary for Electrical Design Engineers
Switchgear layout optimization is not about buying better equipment. It is about designing the room so that the equipment can be installed, maintained, and expanded efficiently. The key parameters are aisle width, cable routing, ventilation, and spare space for future expansion. A layout that ignores these parameters will cost more to operate over the life of the facility. A layout that addresses them will reduce maintenance time, extend equipment life, and simplify future growth. Zhejiang Hanya Electric Appliance Co., Ltd. has been manufacturing Switchgear for over 15 years and provides layout design support for our customers.
Zhejiang Hanya Electric Appliance Co., Ltd. manufactures low-voltage and medium-voltage Switchgear with modular sections, extendable busbars, and front or rear access options. We provide layout drawings, cable routing plans, and ventilation calculations for each project.